Recording Setup
Capture a consistent walking clip before you upload.
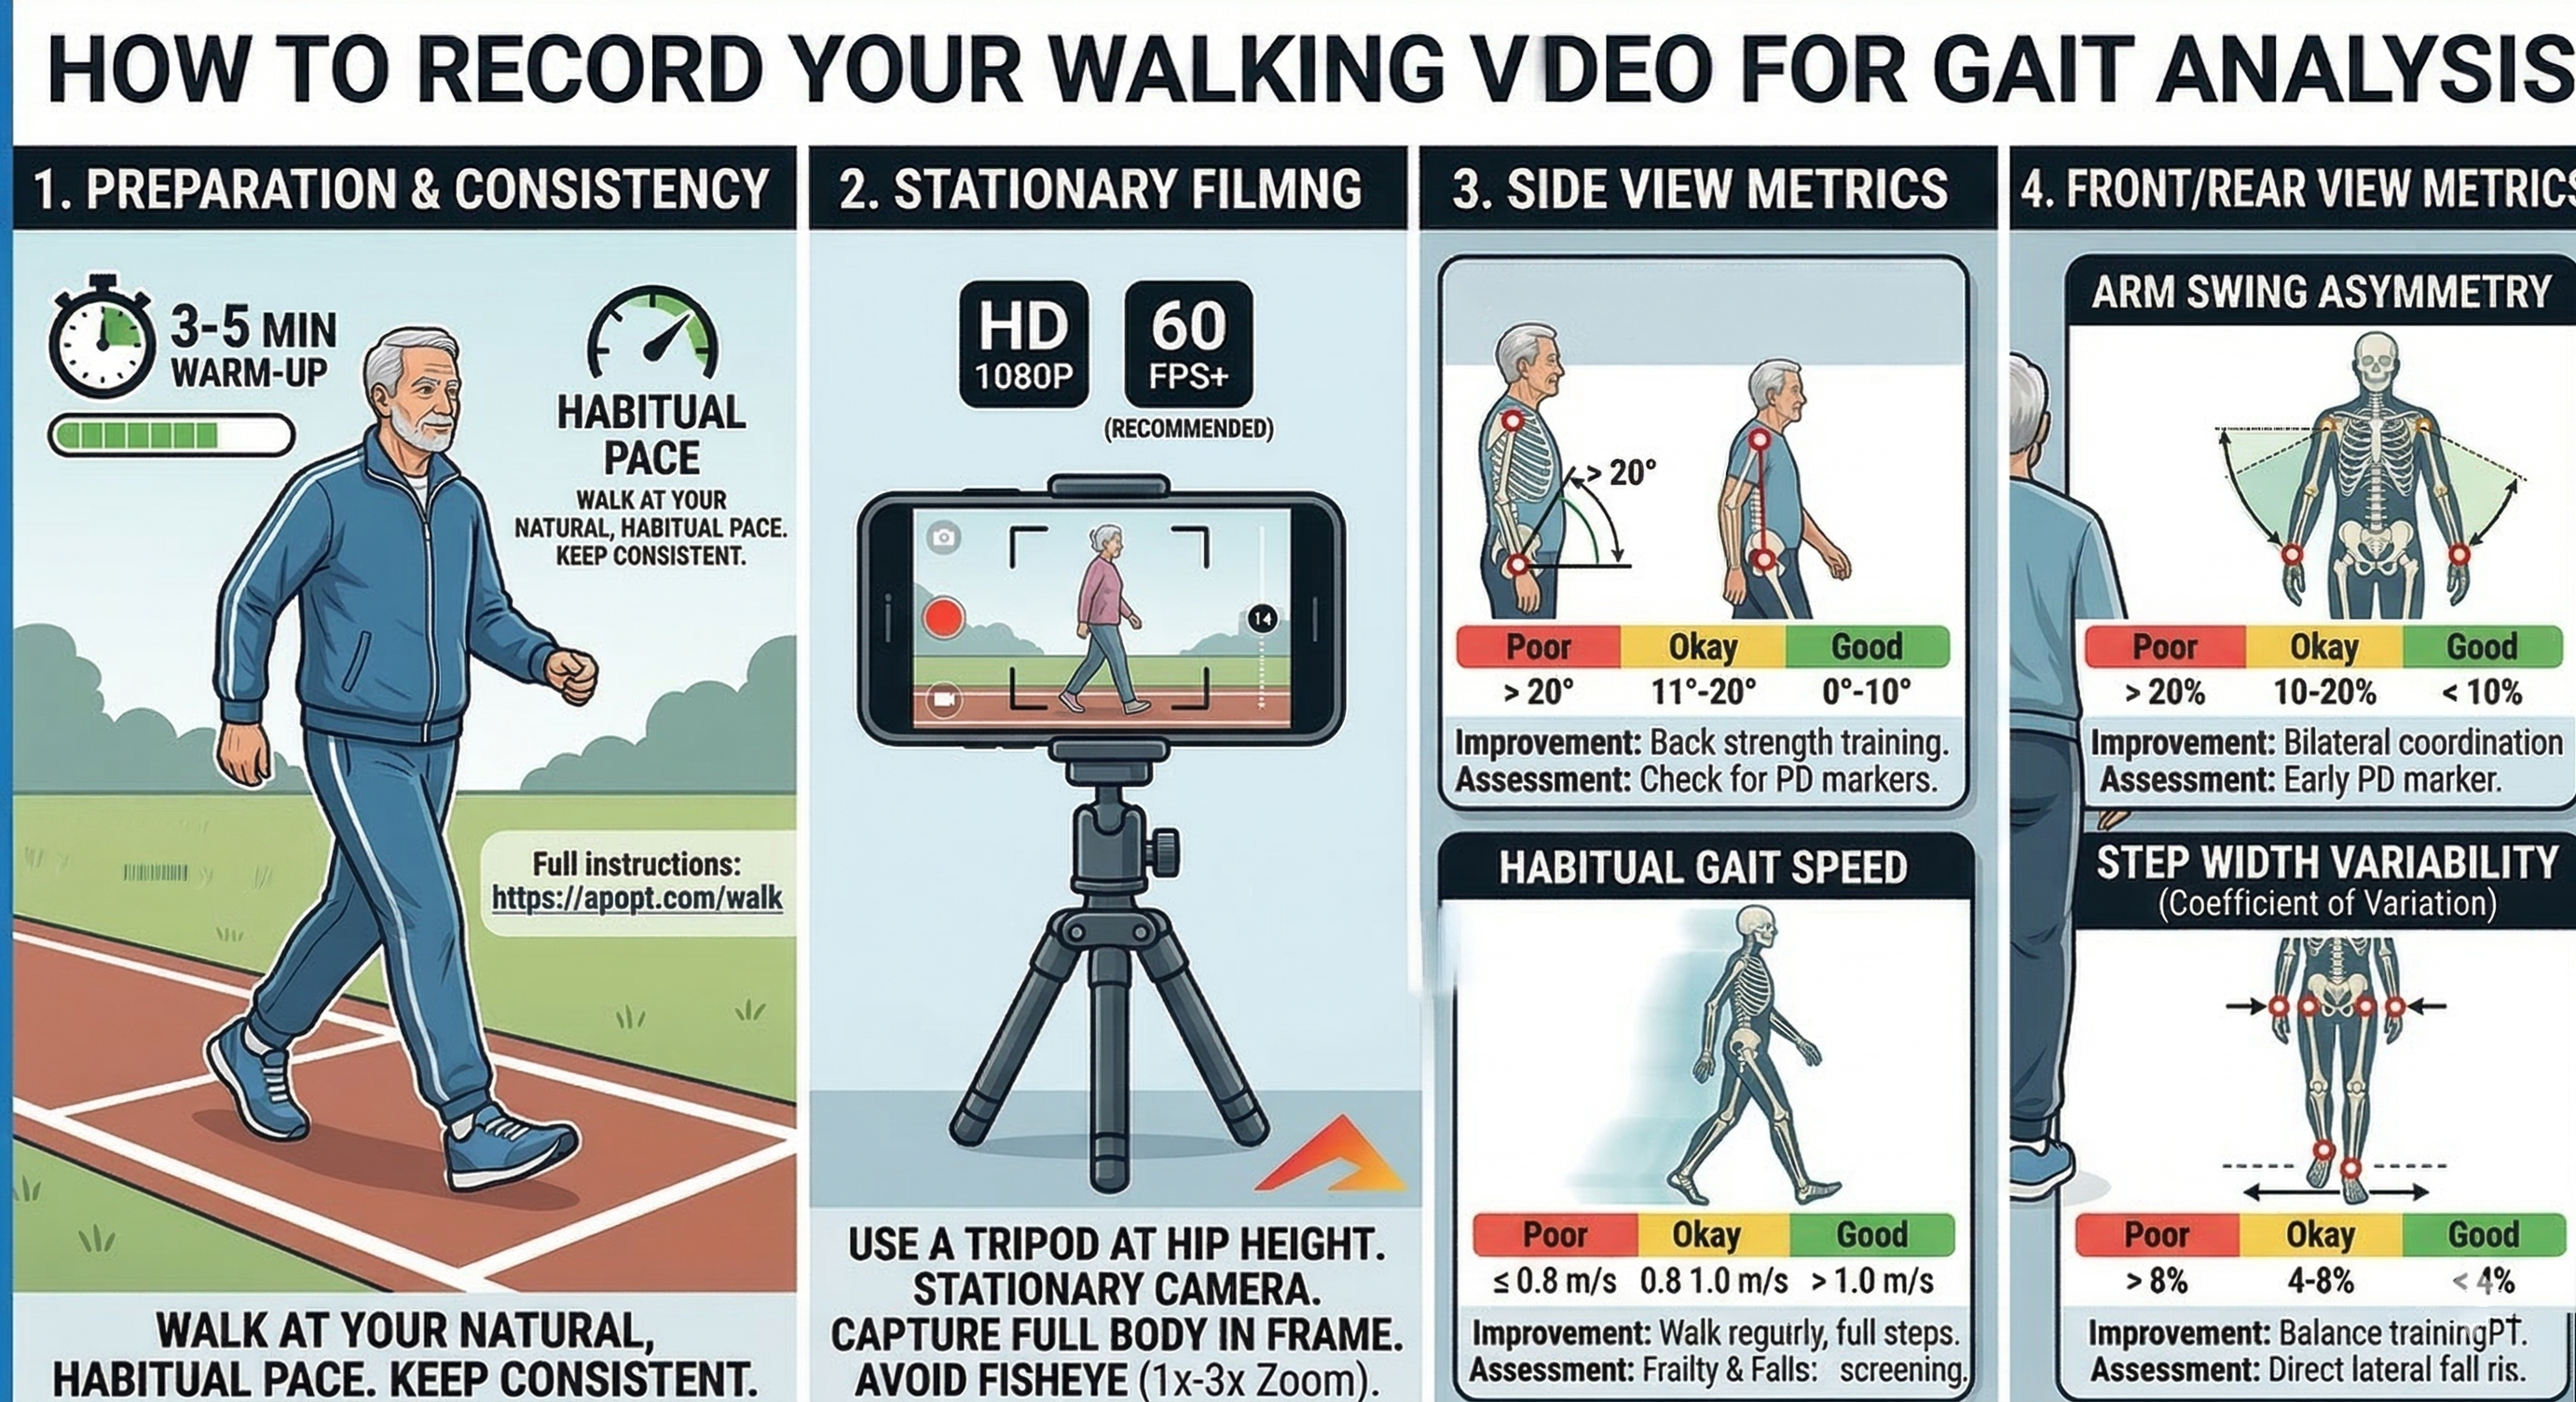
The most reliable analysis comes from a short clip that shows several uninterrupted steps at the person's natural pace. The first figure summarizes the most important filming rules and the app depends on those details more than most people expect.
- Warm up first: walk for about 3-5 minutes so the gait settles into a natural, habitual pace. Keep the pace consistent during the recorded clip.
- Use a stationary camera: film from a tripod or stable support at about hip height. The walk figure recommends HD 1080p and 60 fps or higher when possible.
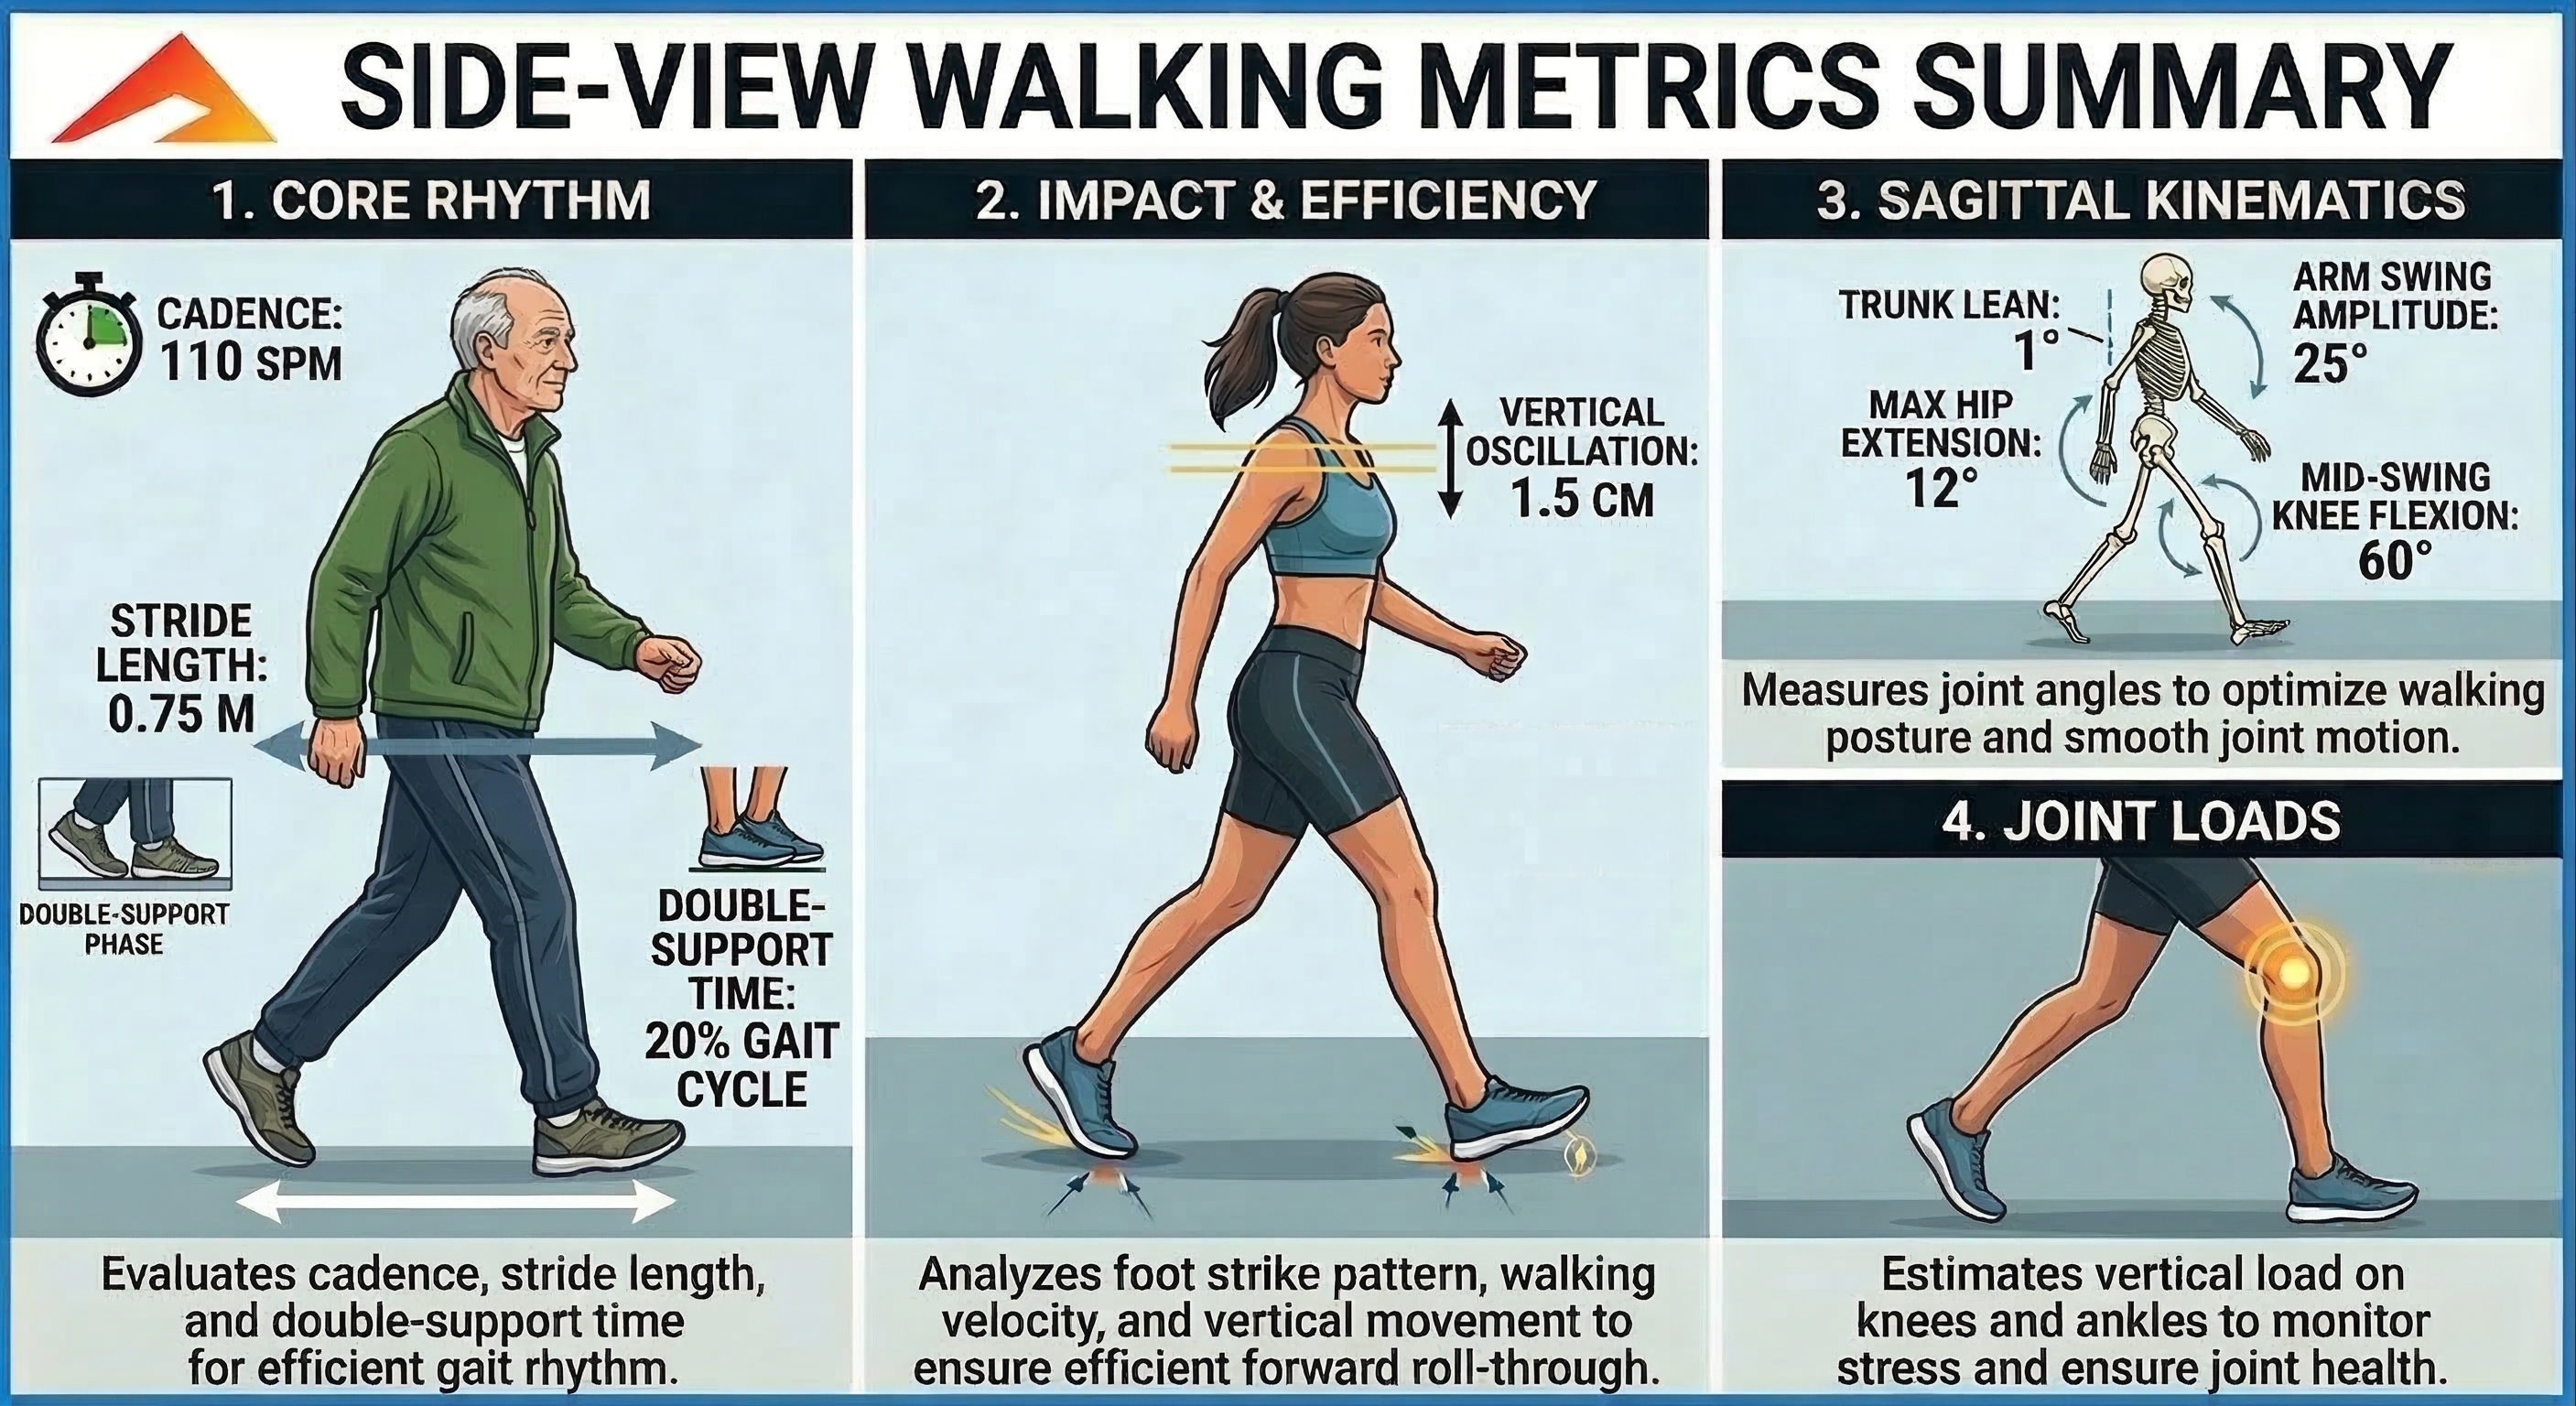
- Keep the full body visible: head, trunk, hips, knees, ankles, and feet should stay in frame for multiple consecutive steps on a straight path.
- Avoid distortion: use a normal lens or modest zoom, roughly 1x to 3x. Avoid fisheye or ultra-wide views because they can distort stride and posture.
- Make the joints easy to see: use bright lighting and clothing that does not hide the shoulders, hips, knees, ankles, or wrists.
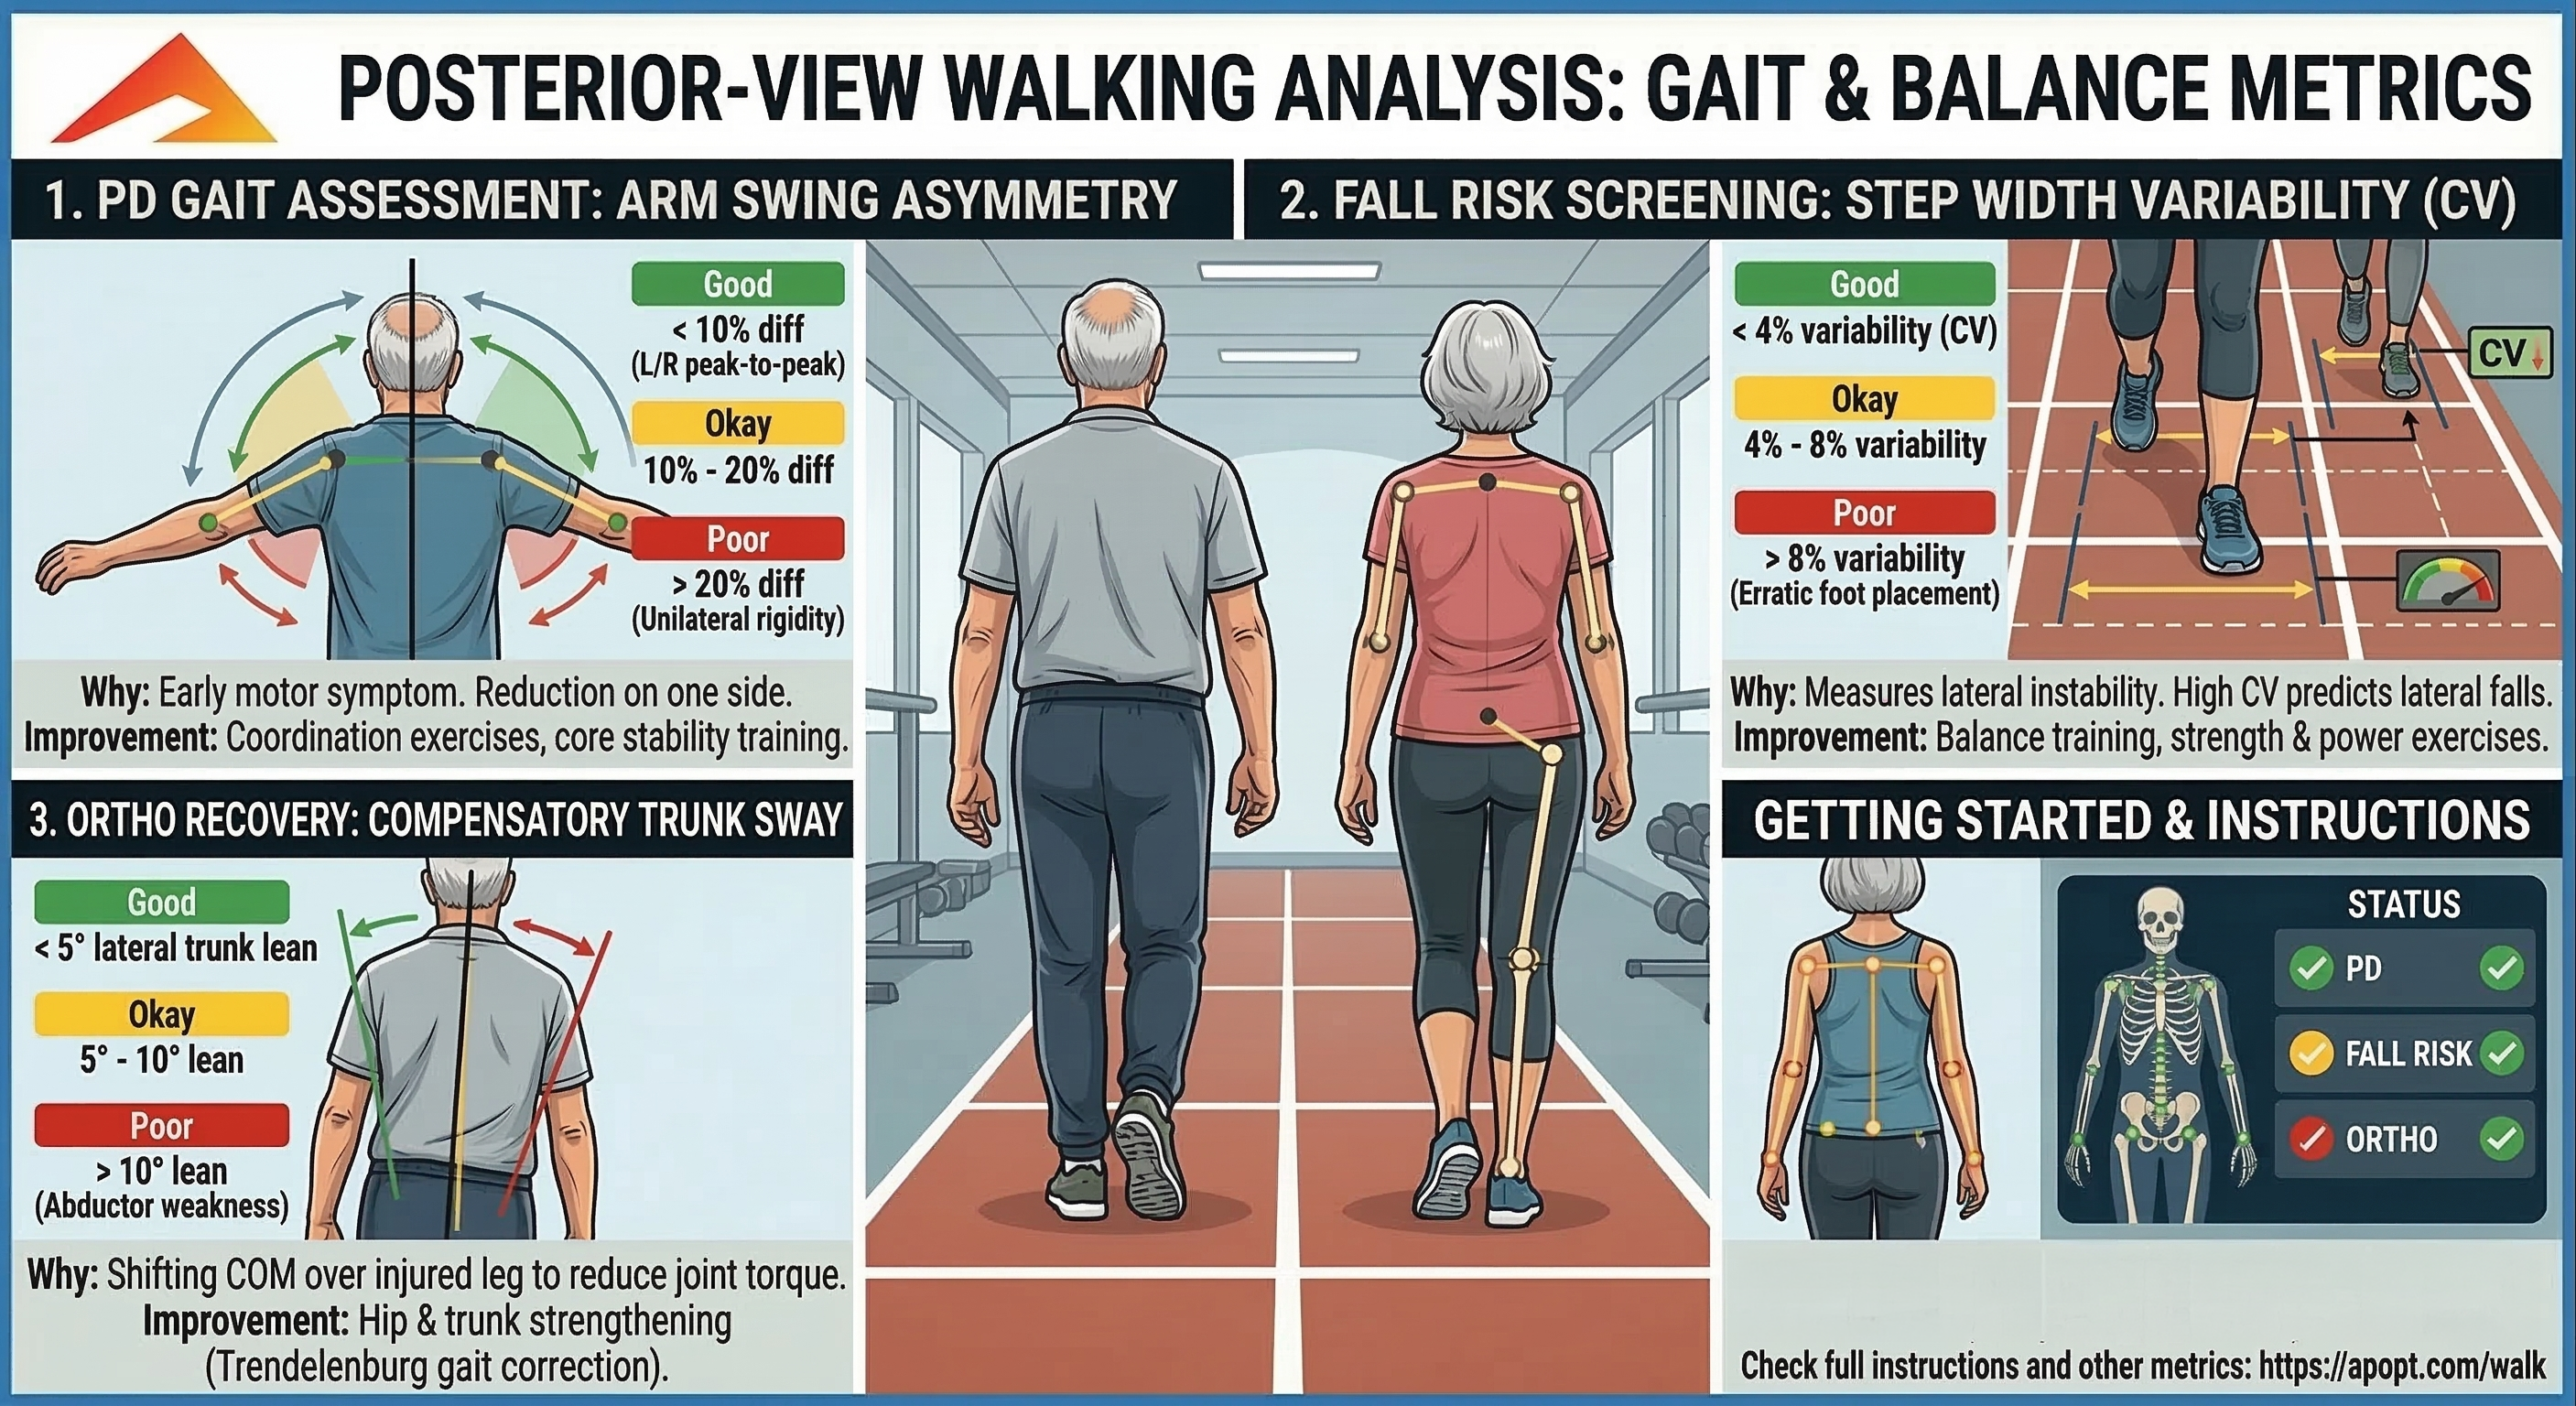
- Choose the correct view: record Side View when you want forward progression, timing, trunk posture, and knee-motion metrics. Record Front / Back when you want symmetry, arm swing, step width, and trunk sway metrics.
- Redo poor clips: if the feet leave frame, the subject turns, another person blocks the view, or the pace changes, record again before interpreting the results.
Important: enter the patient height before judging distance-based values. The walking app
uses height to estimate body scale, pixels per meter, walking speed, stride length, and some front/back
distance notes.
Inside the App
Choose the view, select the assessment type, upload the walking video, review the overlays and metric cards, then use the Results menu to share or download a PDF summary.
Best Clip Checklist
Use several consecutive steps, a straight path, a steady habitual pace, and a subject who remains the most prominent person in frame from start to finish.