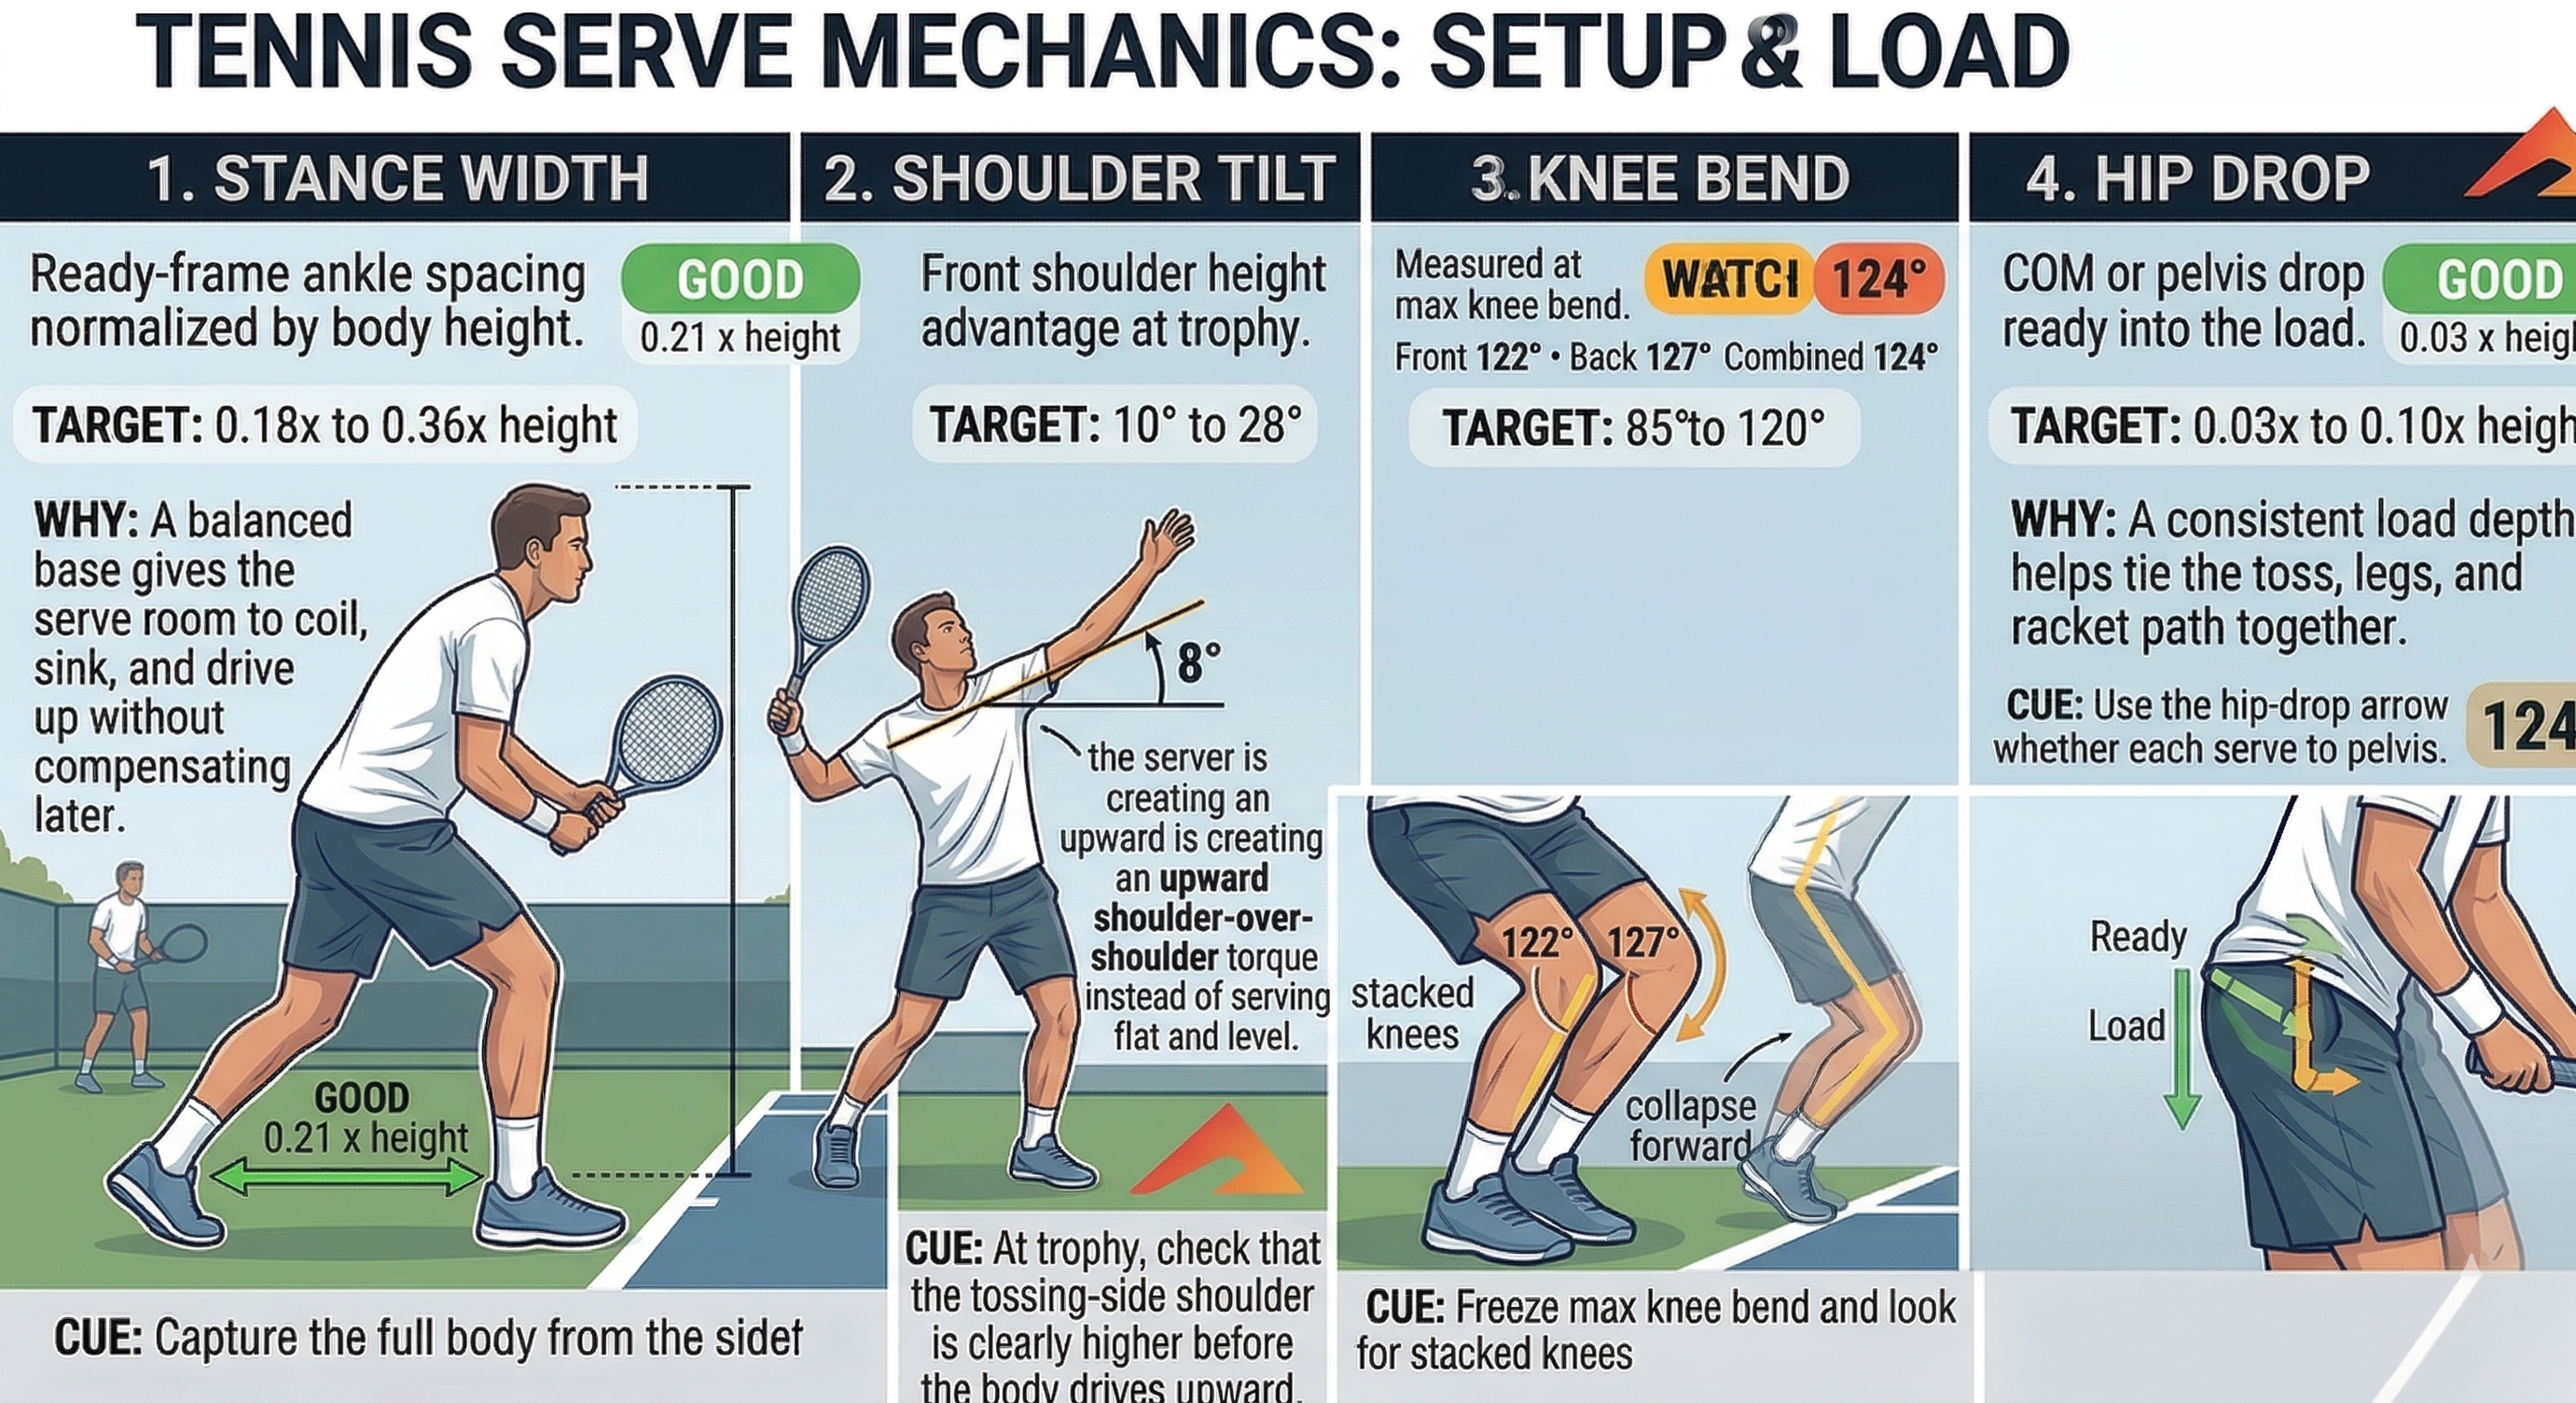
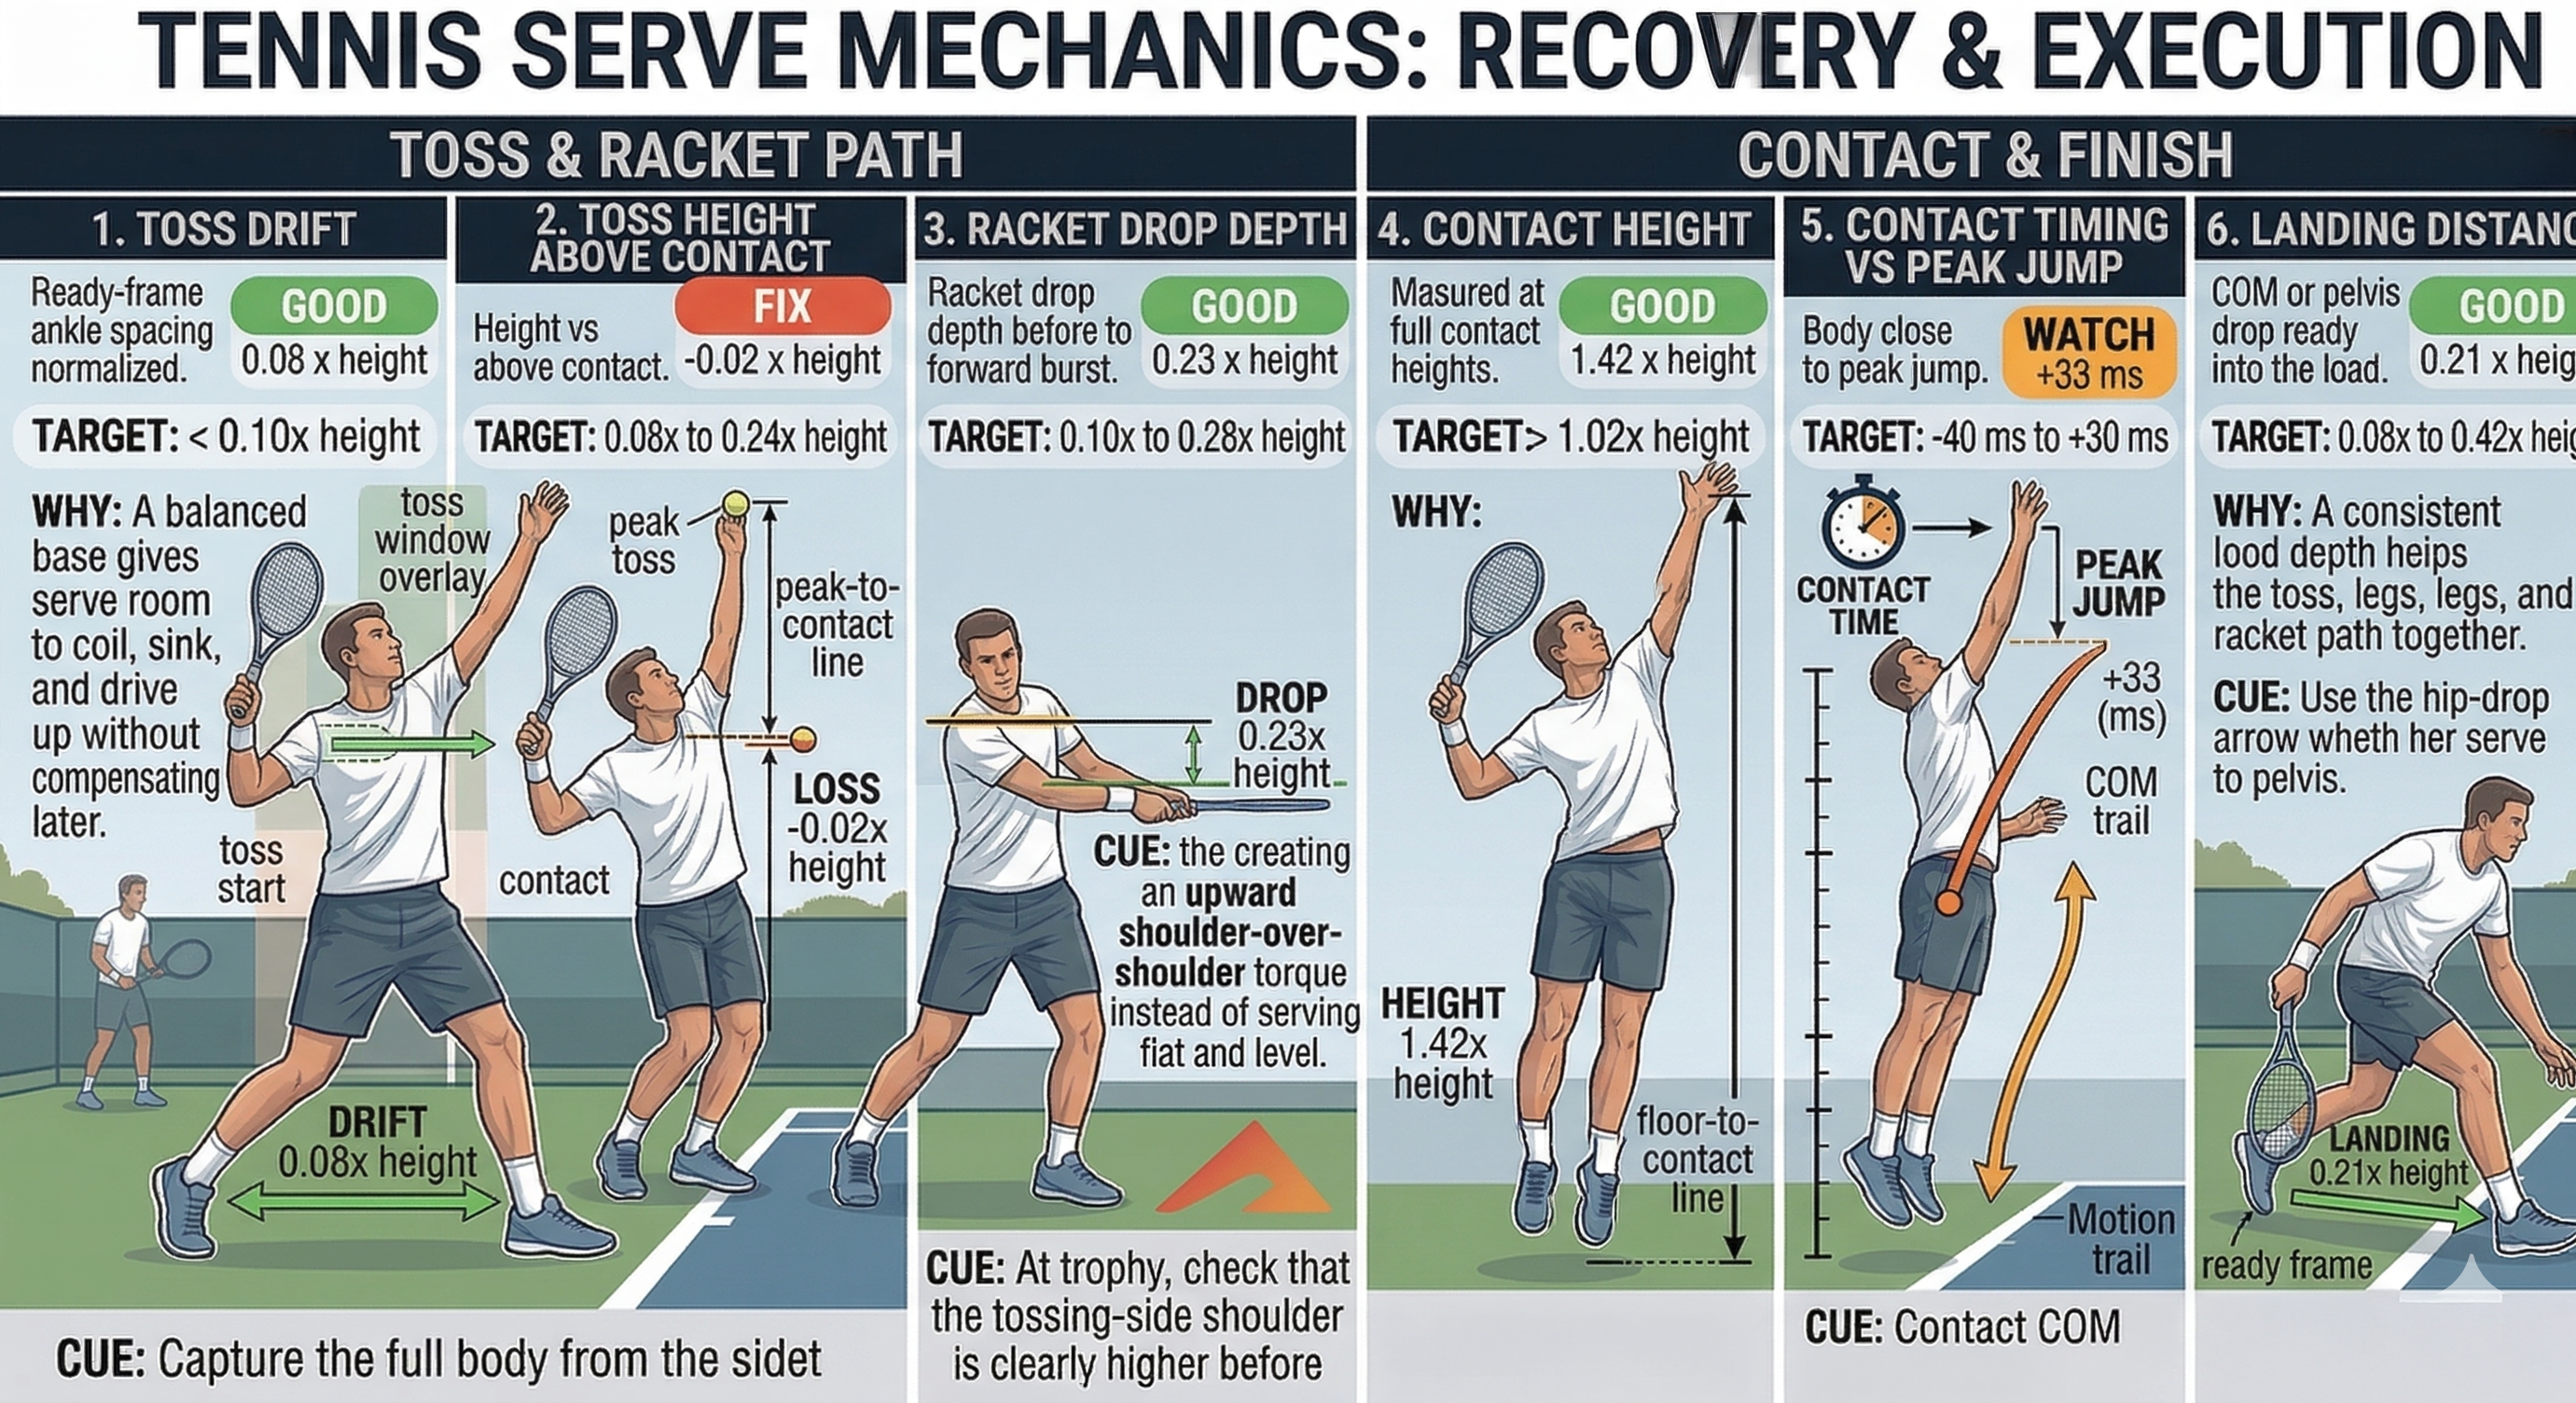
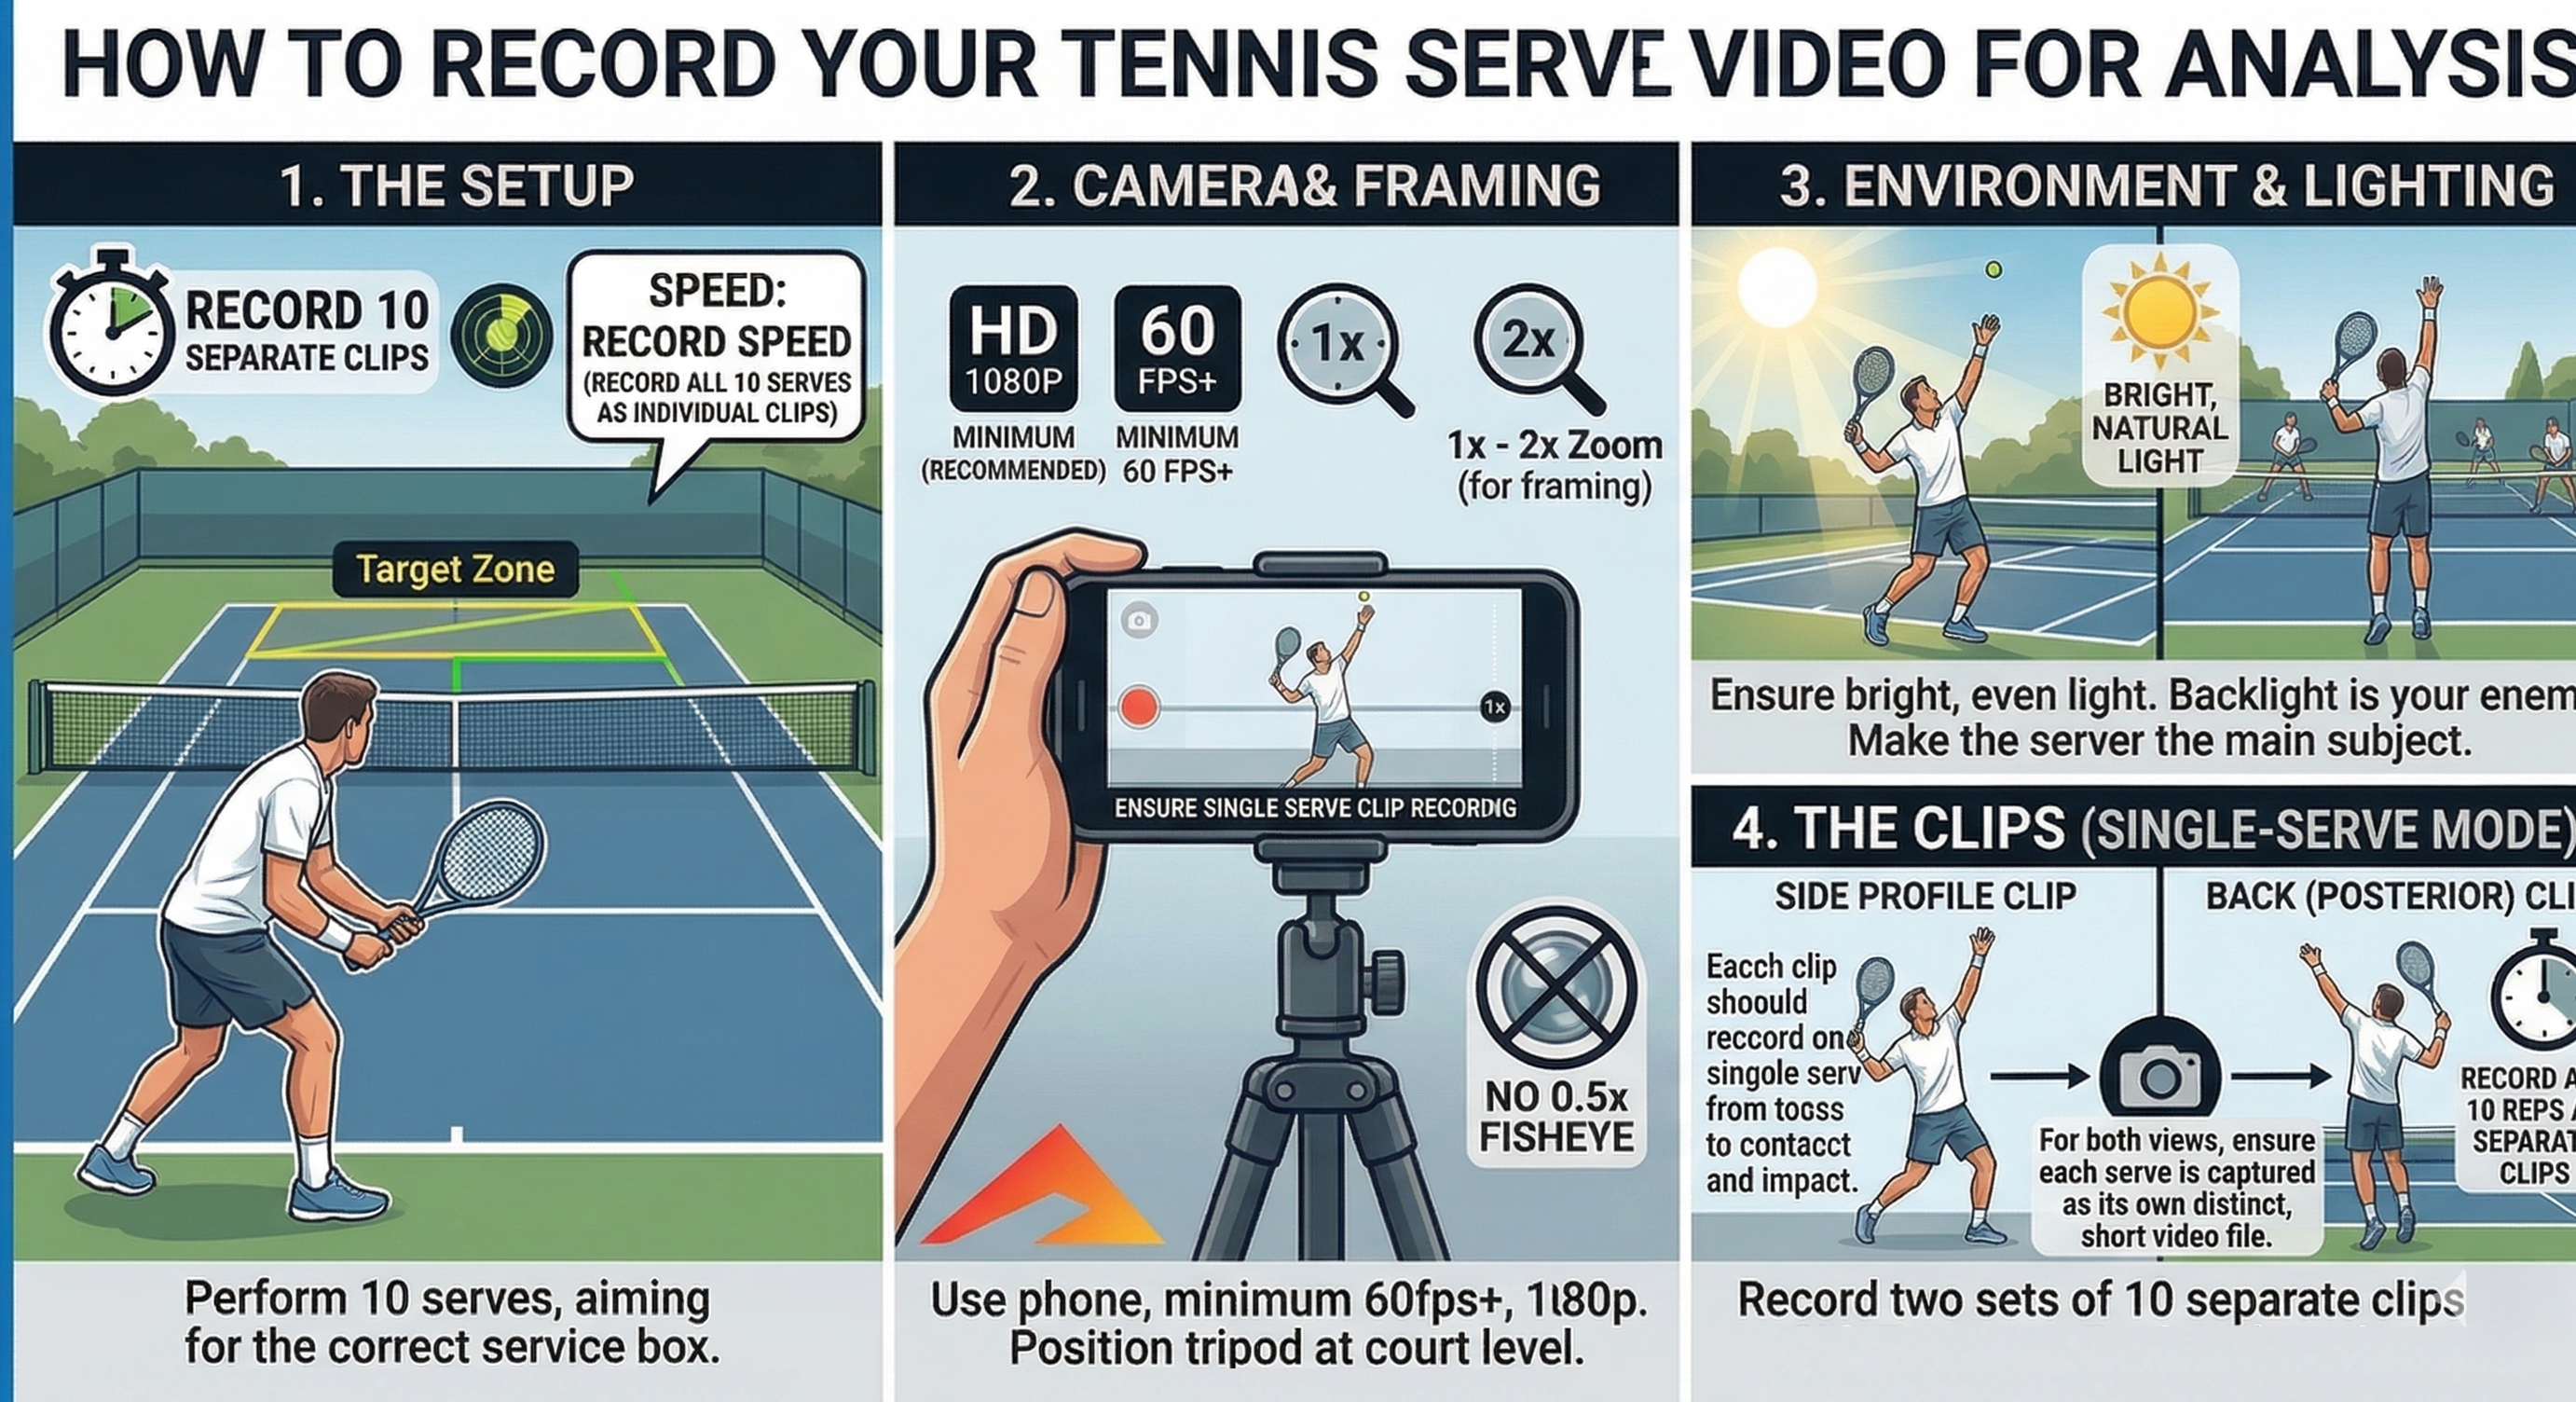
Own the Toss, Load, and Contact Window: AI Tennis Serve Analysis

The Tennis Serve app in /tennis turns individual serve clips into a coachable report card for setup, loading, racket path, strike timing, and landing mechanics. This page mirrors the report so athletes and coaches know how to capture serves cleanly and read the outputs quickly.

AlphaPeak logo

Record clean single-serve clips, keep the toss and racket visible, and compare how the server loads, reaches contact, and moves into the court.

The serve workflow is built around repeatable checkpoints: ready position, trophy shape, max knee bend, racket drop, contact, and landing. When the clip is framed well, the report can turn those moments into practical metrics and coaching cues without overloading the athlete.

1080p minimum 60 fps preferred Side and rear-side views One serve per clip
Instructions for recording tennis serve videos for analysis

Capture Setup

Record separate serve clips with the full athlete, toss, and landing visible from start to finish.

  • Step 1: Record individual clips. Capture one serve per video so toss start, trophy, contact, and landing are easy to isolate and compare.
  • Step 2: Use the right settings. Record at 1080p or better and 60 fps when possible so fast racket and ball events do not blur together.
  • Step 3: Frame from the side. A side or slight rear-side angle usually gives the cleanest view of the tossing arm, knee bend, racket drop, contact height, and landing distance.
  • Step 4: Keep the whole action in frame. Leave enough room above the athlete for the peak toss and enough room in front for the landing into the court.
  • Step 5: Control the environment. Use bright, even light, keep the server as the clearest subject in view, and avoid zoom settings or fisheye lenses that distort the body lines.

For benchmarking sessions, record multiple serves from the same setup. Consistent angle and framing make the setup-and-load scores much more useful from session to session.

Tennis serve mechanics setup and load metrics

Setup & Load

Start with stance, shoulder shape, knee loading, and hip drop before judging anything at contact.

The first analysis block answers a simple question: did the athlete create a balanced, repeatable serve load? These numbers give context for whether later toss or contact problems are coming from the lower-body setup instead of the strike itself.

Stance Width

0.21 x height

Ready-frame ankle spacing normalized by body height. A balanced base helps the server coil and drive up without chasing balance later in the motion.

Shoulder Tilt

8 deg

Front-versus-back shoulder angle at trophy. More upward shoulder-over-shoulder shape often supports a cleaner upward launch into contact.

Knee Bend

124 deg

Combined loading at the deepest leg bend. Too little bend can flatten the serve, while uncontrolled collapse makes timing harder to repeat.

Hip Drop

0.03 x height

COM or pelvis drop from ready into the load. This shows how much the athlete sinks before driving upward into the toss and strike window.

If the setup block is inconsistent from rep to rep, fix those pieces first. Toss and contact metrics are much easier to trust when the load phase is repeatable.

Execution & Finish

The second metrics block shows whether the toss, racket path, contact timing, and landing all stay in sync.

Once the athlete builds the load, the report shifts to strike-window quality. These measures help coaches separate a drifting toss from a shallow racket drop, a late contact from a mistimed jump, or a good strike from a finish that fails to carry momentum into the court.

Toss Drift

0.08 x height

Horizontal movement from toss start to contact. Lower drift usually means the serve is staying inside a more stable strike lane.

Toss Height Above Contact

-0.02 x height

Peak toss height relative to contact height. This helps show whether the ball is peaking high enough to give the server a usable timing window.

Racket Drop Depth

0.23 x height

Vertical drop of the racket below the hitting shoulder before acceleration. It is a practical proxy for how much the serve can build upward path and speed.

Contact Height

1.42 x height

Ball height at strike relative to body height. A higher, well-timed contact usually reflects better reach and a cleaner extension into the court.

Contact Timing vs Peak Jump

+33 ms

Milliseconds between peak body rise and contact. Positive values mean contact happened after peak rise, which can signal a slightly delayed strike.

Landing Distance

0.21 x height

Forward travel from ready into landing. This acts as a simple proxy for how well the athlete converts the load into forward momentum after contact.

The best coaching priority is usually the earliest breakdown that explains the rest of the sequence: stabilize the toss lane, improve the load, or sync contact better with the body rise before chasing power.

Tennis serve mechanics recovery and execution metrics